Showing posts with label tutorial. Show all posts

Wednesday, August 10, 2016

Crème Brûlée Two Ways

America's Test Chicken consists of two separate chickens, each with her own take on this cooking thing. Check out Chicken One's related blog, A Travel for Taste where she shares travel stories and recipes collected whenever she ventures abroad. And give Chicken Two's new, also-related blog, Poop from the Coop a read. There you can find stories about her personal adventure re-experiencing the kitchen after many years away. Please join our Facebook group to share your own recipes, kitchen practices and know-how. We are also on Pinterest and Instagram.
The complete recipes appear at the end of this post.


From Chicken One:
Crème Anglaise, er, Brûlée

I wouldn't exactly say that I had a SCAFU (Situation Chicken All Fowled Up) with this project, but maybe a Scaflette. Since I always strive to make the most authentic version of any recipe the first time, I went to what I thought was the source: Julia Child's Mastering the Art of French Cooking.

However, in the book, Julia rather imperiously informs the reader:
Although many people think of it as a French dessert, crème brûlée is actually Creole.
A later edition of the same book replaced that line with:
Crème brûlée originated in England, it appears, at Christ’s College in Cambridge. 
 Both are followed by the exact same directions:
Make the basic cream exactly like the preceding crème anglaise, but use half the amount of sugar, and whipping cream instead of milk. Chill in a serving dish.
I assumed that I should follow these modified instructions to the crème angalise recipe and end up with custardy crème brûlée.

Therefore, I less-than-simmered the egg/milk mixture til it coated the spoon:
...poured equal amounts into four ramekins:
...and put them in the refrigerator to chill. But, after a couple of hours, I still had liquidy crème anglaise.

So, the Two Chickens having put our heads together on the subject, I put the crème anglaise in the oven just like a normal crème brûlée recipe says to do.

You have to bake the dishes in what is called a bain marie, which is nothing more than a water bath. Use a deep baking dish with all the custard dishes placed inside. Once in the oven, you fill the baking dish with boiling water til it comes halfway up the sides of the custard dishes. The water helps even out the temperature for the custard and also creates steam that prevents a tough skin forming on top of each dish.

Only then did I end up with custardy crème brûlée at last! THEN I put them in the fridge to completely cool.

Almost anticlimactically, but not quite, I got to use my new kitchen torch to carmelize the sugar on top, which was kind of the whole point of the endeavor anyway!
 
So, save yourself some trouble and follow the recipe below - I've modified the original to the procedure I actually followed - and you'll be fine. 

It IS delicious!

From Chicken Two:
Coffee Crème Brûlée
I think of all the dishes on my cooking bucket list, this is the one that has haunted me for some time. Maybe I was afraid of setting the kitchen on fire! Who knows? But, honestly, it turned out to be so much simpler than I ever imagined.
Cream, milk, sugar and salt in one pan warmed (careful not to boil) until sugar is melted.
Whisk eggs and add the warm cream mixture slowly...
mixing gently, so as not to create foam.
I didn't have any brûlée dishes, something I later resolved, but 4-oz ramekins worked just fine. You have to use 6 instead of 4, but, hey, more to eat!
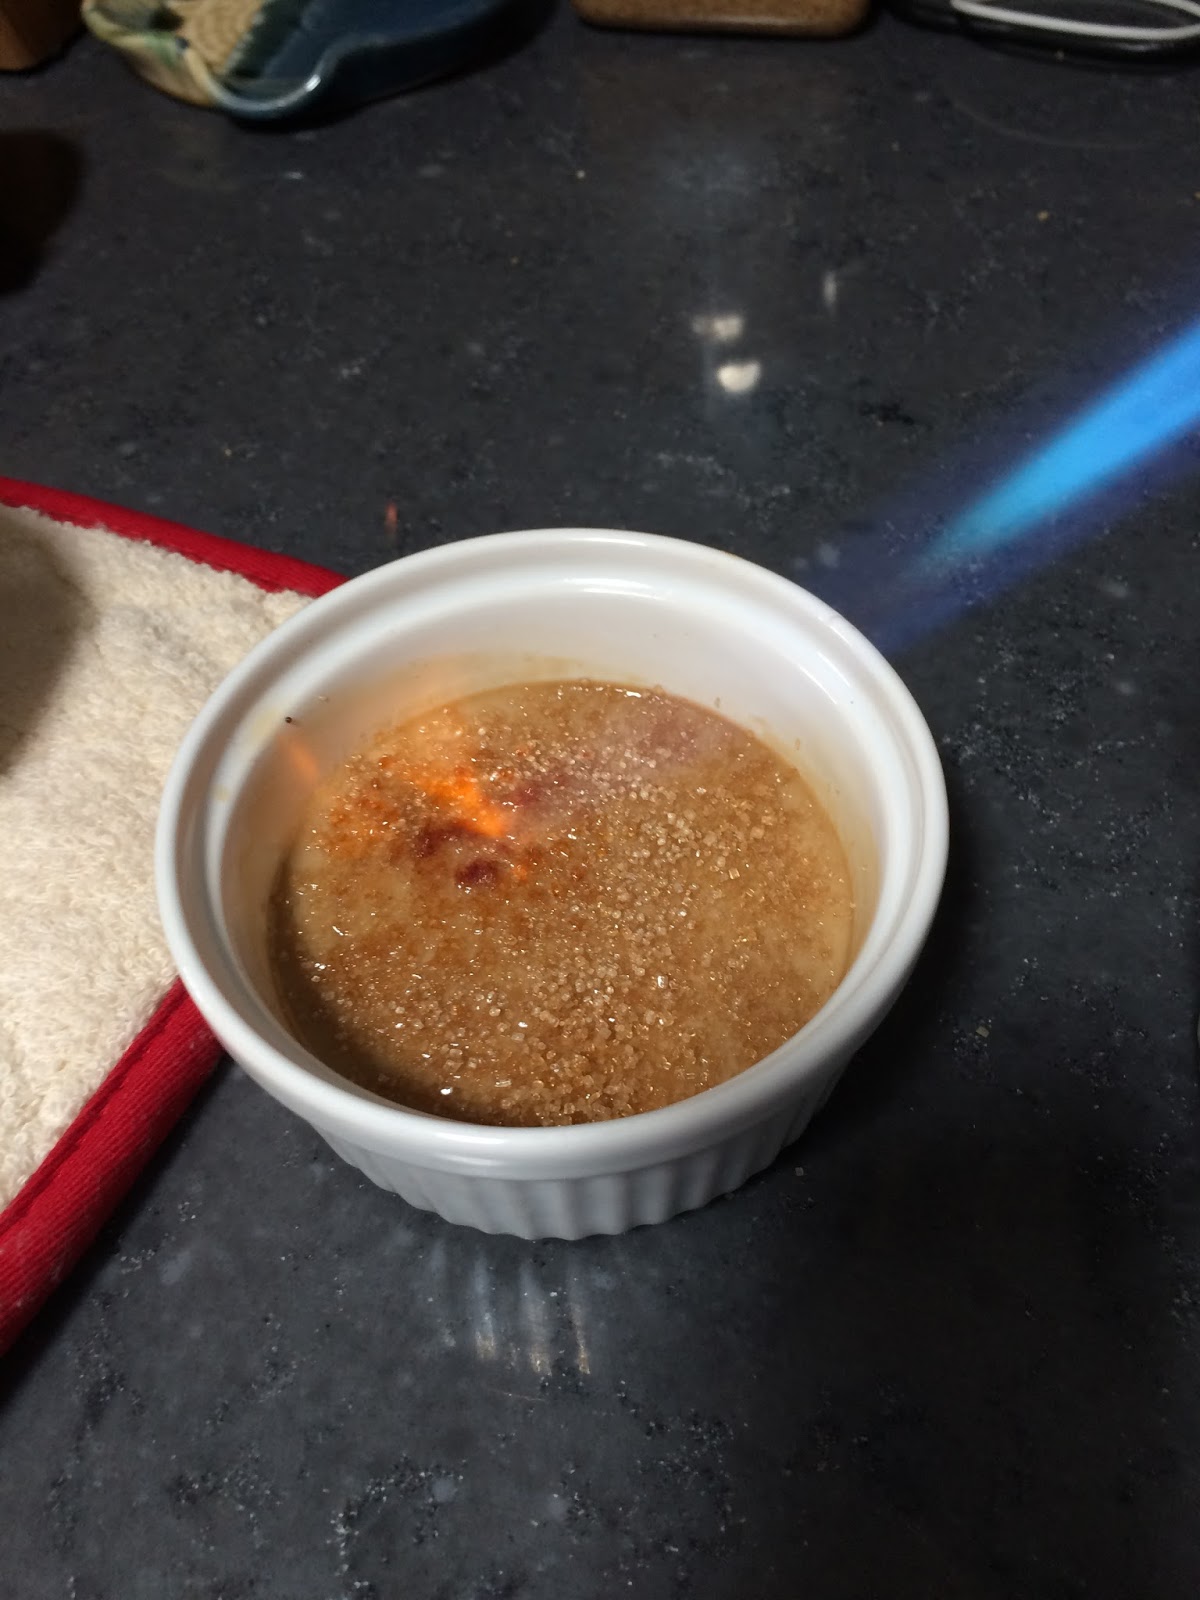
See the flame? Cool, huh! Not sure why I was so intimidated at the thought of this process, but I actually loved doing it. For all you coffee lovers, it's really yummy! 

Crème Brûlée 
(modified from crème anglaise per Julia Child)
Makes about 2 cups

Julia sez: This sauce is a blend of egg yolks, sugar, and milk stirred over heat until it thickens into a light cream. If it comes near the simmer, the yolks will scramble. Although it can be omitted, a very small amount of starch in the sauce acts as a safeguard just in case the heat becomes too much for the egg yolks. Some recipes direct that the sauce be cooked in a double boiler; this is slow work and quite unnecessary if you concentrate on what you are doing, and use a heavy-bottomed saucepan. A candy thermometer is a useful guide. Vanilla is the basic flavoring; others are added to the vanilla if you wish (see below).

Ingredients:
1/4 cup granulated sugar
4 egg yolks
1 tsp cornstarch or potato starch, optional
1 ¾ cup barely boiling whipping cream

Instructions:
Preheat the oven to 300 F (150 C).

In a 3-quart mixing bowl, gradually beat the sugar into the egg yolks and continue beating for 2 to 3 minutes until the mixture is pale yellow and forms a silky ribbon.

Beat in the optional starch.

While beating the yolk mixture, very gradually pour on the boiling cream in a thin stream of droplets so that the yolks are slowly warmed. Too fast and you’ll have scrambled eggs.

Pour the mixture into a clean, heavy-bottomed enameled or stainless steel saucepan and set over moderate heat, stirring slowly and continuously with a wooden spatula or spoon, and reaching all over the bottom and sides of the pan, until the sauce thickens just enough to coat the spoon with a light, creamy layer. Do not let the custard come anywhere near the simmer. Maximum temperature is 165 degrees on the candy thermometer (170 if you have used starch). Then beat the sauce off heat for a minute or two to cool it. Strain it through a fine sieve, and beat in vanilla extract plus any optional flavorings:

1 Tablespoon rum, kirsch, cognac, orange liqueur or instant coffee OR,
2 or 3 ounces or squares of semisweet baking chocolate melted in the cream, and 1 tsp vanilla extract stirred into the finished sauce

Pour equal amounts into four oven-proof (ramekins or crème brûlée dishes). Place a large, high-sided baking dish on an oven rack. Put the custard dishes in the baking dish and make sure they all sit level. Pour boiling water into the baking dish so that the water comes halfway up the sides of the custard dishes. Gently slide into the oven and close the door.
 Coffee Crème Brûlée

1 1/3 cups heavy cream
2/3 cup whole or low-fat milk
1/4 cup granulated sugar, plus more for caramelizing
Pinch of sea salt or kosher salt
4 large egg yolks
1 tbsp instant espresso or coffee powder
2 tsp Kahlua or other coffee-flavored liqueur

1. Preheat oven to 300F (150C)

2. Put four individual gratin dishes (or 6 ramekins) on a high-rimmed baking sheet or any pan with sides big enough to hold them. (I had to use 2)

3. In a small saucepan over medium heat, warm the cream, milk, sugar and salt until the sugar is melted.

4. In a bowl, whisk together the egg yolks. Gradually add the warm cream to the egg yolks in a steady stream, stirring until the cream is completely incorporated. Don't beat it, you don't want foam. Mix in the espresso  powder and strain the mixture into a large measuring cup (or something with a spout) and then stir in the Kahlua. 

5. Divide the mixture among the dishes. Put the baking sheet of custards on the oven rack and pour enough hot water on the sheet so that it reaches at least halfway up the sides of the dishes. Bake for 20 - 25 minutes or until they are just set. They should barely quiver when you jiggle the pan.  Remove and set them on a cooling rack. When cool, refrigerate until ready to serve.

6. To caramelize, sprinkle the tops with an even layer of sugar. It should cover the top but not too heavily - about 1 1/2 tsp should do it. Using a blowtorch, wave the flame over each custard, one at a time, until the sugar melts and browns. Serve immediately. Yum!

Wednesday, June 22, 2016

Chicken Biryani and Mango Bread Pudding

America's Test Chicken consists of two separate chickens, each with her own take on this cooking thing. Check out Chicken One's related blog, A Travel for Taste where she shares travel stories and recipes collected whenever she ventures abroad. And give Chicken Two's very relevant blog, Poop from the Coop, a read. There you can find stories about her personal adventure re-experiencing the kitchen after many years away. Please join our Facebook group to share your own recipes, kitchen practices and know-how. We are also on Pinterest and Instagram.
The complete recipes appear at the end of this post. 

From Chicken One:
Chicken Biryani from Ambur in Southern India

This recipe is from one of my favorite Indian food blogs, Indian Kitchen. I've learned so much from the author, Preeti Tamilarasan, and will try to pass along what I've learned here.

The dish this time is biryani, variably spelled biriyani. It's a spicy (of course) meat and rice dish and could easily be confused with curry. I think the difference is that, for biryani, the rice is cooked with the meat and spices instead of being served along with them.

Biryani is made with what is called a "dum" process. Basically, it's layering the meat and spice mixture with partially cooked rice in a tightly covered pan for the final cooking stage. This effectively steams the rice done and allows the flavors to marry and permeate the rice.

Another thing about this recipe is that (it seems to me) many Indian recipes call for, or mention as optional, adding food coloring. It's true for many tandoori recipes and also for this one. I don't like to add colors, but maybe it's a characteristic of the cuisine to do so. In my opinion, turmeric is enough food coloring!


One more note: this recipe (and many of Preeti's recipes) call for ginger-garlic paste. It's simply equal measures of fresh garlic and ginger all mashed together with a little olive oil to form a paste. I make my own, though I've seen it at the Indian market for sale in jars.

As is typical for Indian cuisine, this recipe starts with infusing some hot oil with a few spices before adding anything else to the pan:

There are a lot of different spices in this dish, as well as chicken, onions, tomatoes, mint and cilantro. The chicken is cooked with some of the spices first, then the rest of the ingredients are added:
This is known as a chicken masala (="mixture"). It's set aside while you partially cook some basmati rice. And here is where the one SCAFU (Situation Chicken All Fowled Up) occurred. I overcooked the rice, which resulted in the biryani being kind of mushy. But the taste was there and I'll know better next time.

Just cook the rice barely halfway so it's still crunchy and remove from the heat. Then layer the masala with the rice in the original masala pan, cover tightly and cook on low for about 30 minutes.
 At the end, stir it all up together and serve hot.
Preeti's instructions state you can pressure cook this recipe. She writes this intriguing note at the end: "Pressure cook for 2 whistles and serve hot."

What? I've used pressure cookers but had no idea what that meant! With some internet sleuthing, I found a comment in a Chowhound.com forum. It said pressure cook three minutes for every whistle the recipe calls for. 

Well, that was helpful, but I still needed more info. If you're interested in a full explanation about whistling pressure cookers in India, click here. I love the 'net!

From Chicken Two:
Mango Bread Pudding with Chai Spices
Well, what's a great dinner without a tasty desert?

I got this recipe from Indian Cooking Unfolded by Raghavan Iyer, my go-to cookbook for all things Indian.

If you're a beginner like me, I highly recommend it. 

This recipe combines an old comfort food, bread pudding, with wonderful chai spices and fresh fruit.
I used a day old french baguette.
Fresh mangoes, cubed.
I used a coffee grinder for the spices (not the same one I use for coffee). Be sure to grind to a fine consistency or you will be picking spices out of your teeth! Been there, done that!
Yummy!

Ok, I confess....I made this recipe twice before I got it right. My mangoes were super ripe and super juicy so the consistency was too moist even though I allotted extra baking time. The second time I used not-so-ripe mangoes and it was fine. If you can only get ripe ones, cut back on the milk a little. And grind, grind, grind those spices! I had chunks of peppercorn between my teeth the first time. This was definitely worth remaking to get it right! It was yummy! Give it a try!
Happy cooking!

Chicken Biryani from Ambur (South India)

Ingredients
  • 10 ounces chicken, cubed
  • 1/4 teaspoon ground turmeric
  • 4 tablespoons vegetable oil
  • 3 cloves
  • 1/2 cinnamon stick
  • 1 star anise
  • 2 to 3 bay leaves
  • 2 green cardamom pods
  • 2 tablespoons ginger-garlic paste
  • 1 cup plain yogurt, whisked
  • salt to taste (about 2 teaspoons)
  • 3 medium onions, chopped fine
  • 1 to 2 green chilis (serrano or jalepeno), chopped
  • 3 medium tomatoes, chopped fine
  • 1 cup fresh mint leaves, moderately packed
  • 1/4 cup fresh cilantro leaves, chopped
  • 1 teaspoon cayenne pepper
  • 1/2 teaspoon ground coriander
  • 9 cups water
  • 2 cups basmati rice
  • 1 teaspoon lemon juice
Cooking Directions
  1. For the chicken masala:
  2. Marinate chicken turmeric for 10 minutes.
  3. Heat oil in a heavy pan large enough to hold the chicken mixture and the cooked rice. Infuse the oil by adding cloves, cinnamon, star anise, bay leaf and cardamom. Cook for a minute or two.
  4. Add ginger-garlic paste and saute til hot through. Add 1 tablespoon yogurt and cook for a minute on low.
  5. Add marinated chicken and about 1/2 teaspoon salt. Cook, covered, on low for 10 minutes.
  6. Add chopped onions and green chilies. Cook for a minute.
  7. Add chopped tomatoes and mash the pulp. Cook for a minute.
  8. Add mint and cilantro. Saute for 2 minutes. Add cayenne, coriander powder and remaining yogurt.
  9. Mix well everything and let it cook for another 5 minutes.
  10. Remove from the heat and transfer this masala to another bowl. Set aside.
  11. For the rice :
  12. Soak rice for 20 minutes, drain and rinse.
  13. Boil 9 cups water in a large saucepan. Once it starts boiling, add rice.
  14. Add salt to taste, about 2 teaspoons, and sprinkle with lemon juice.
  15. Cook, uncovered,on medium-low til half cooked (about 6 to 10 minutes). The grains will be long & firm but not hard. And the grains will be separate.
  16. Remove from the heat and drain the water completely. Set aside.
  17. For the dum process:
  18. In the same pan in which you cooked the chicken masala, pour a ladle full of masala to the pan and spread to cover the bottom.
  19. Spread a layer of rice to cover the chicken.
  20. Continue layering chicken masala with rice until you use up the ingredients. End with a layer of rice.
  21. Cook, tightly covered (use aluminum foil if you need to), over a low flame for 20 to 30 minutes.
  22. Remove from heat just before serving.
  23. Mix everything well and serve hot.

Mango Bread Pudding with Chai Spices
Ingredients


  • nonfat cooking spray
  • 4 cups stale bread, cubed
  • 2 large ripe mangoes, cubed - about 4 cups
  • 1/2 teaspoon black peppercorns
  • 1/2 teaspoon whole cloves
  • 1/2 teaspoon cardamom seeds
  • 1 piece cinnamon stick, broken into small pieces
  • 2 cups whole milk
  • 2 large egg whites, slightly beaten
  • 12 cup tightly packed brown sugar
  • 1 teaspoon pure vanilla extract
  • whipped cream - optional

1. Position a rack in the center of the oven and preheat to 350 F. Lightly spray a 9 inch square baking dish with cooking spray.
2. Pile the bread and mango cubes into the baking dish, distributing them evenly.

3. Grind peppercorns, cloves, cardamom seeds, and cinnamon stick to  the consistency of finely ground pepper.

4. Place the milk, egg whites, brown sugar, vanilla and freshly ground spices in a medium size bowl ans whisk to mix. Pour over the bread and mangoes and allow to sit for about 5 minutes to get thoroughly soaked.

5. Bake the pudding, uncovered, until it appears to have set and an inserted knife comes out clean - about 1 hour and 15 minutes.

6. Serve warm with whipped cream, if desired. It was wonderfully sweet and spicy, so I chose not to use the topping.
 Print Friendly and PDF

Wednesday, May 11, 2016

Fennel Slaw and Indian Slaw

America's Test Chicken consists of two separate chickens, each with her own take on this cooking thing. Check out Chicken One's related blog, A Travel for Taste where she shares travel stories and recipes collected whenever she ventures abroad. And give Chicken Two's new, also-related blog, Poop from the Coop a read. There you can find stories about her personal adventure re-experiencing the kitchen after many years away. Please join our Facebook group to share your own recipes, kitchen practices and know-how. We are also on Pinterest and Instagram.
The complete recipes appear at the end of this post.


From Chicken One:
Fennel Slaw

I chose a delicate slaw this time from one of my fave Indian cookbooks by Vikas Khanna, Indian Harvest. If you'd like to witness someone who is spiritually connected to food, search on this guy's name on YouTube. He's wonderfully inspiring to listen to as he talks about food.

This dish is a light, summery fennel slaw with a tangy dressing and sweet, sweet honeydew melon balls. Just looking at these photos makes my mouth water! 

With the hot weather bearing down on us, we thought we'd give you some light yet spicy options for a flavorful repast. A great advantage to cooking light is that the recipes are quick and easy, too.
No cooking is required, of course, and only one fennel bulb, thinly shredded. You get all this from one bulb, about four servings:
The dressing is very vinegary, and next time I will reduce the vinegar to half of what the recipe calls for. The taste is so tangy that it's hard to eat without the melon sweetness in the same bite to offset the edge. So I added more melon this time!

The dressing is made with lightly toasted cumin seeds ground fine. 
The wonderful aroma permeates the kitchen as it's toasted and ground, and you can't believe the difference in flavor. You could use ground cumin from a jar as well, but the flavor is much less intense.

Enjoy the summer with this light, sweet salad. It makes a perfect lunch or a side to accompany a main course.

From Chicken Two:
Bund Gobhi Nu Shaak (Indian Slaw)

I was looking for a salad that I felt would balance out a wonderfully spicy Indian meal that included a vindaloo and a creamy corn curry. I wanted something with great flavor that would stand up to the other strong tastes but not overpower. This salad works!
Because my time was short, I bought a coleslaw mix to use, which worked out great.

The combination of hot (serranos) and sweet (coconut) along with the roasted peanuts was a tantalizing mixture for the taste buds!
You will find the recipe below but here's a couple of hints:
I recommend dry roasted peanuts and definitely unsalted. Grind into a bread crumb consistency and mix with all the other ingredients except the mustard seed. Don't fall asleep with your hand on the grind button or you will wind up with a paste!
When roasting the mustard seed, be sure to put a lid on it before you hear the first pop or two. Otherwise you could get hot oil or a seed in the face. Ouch! The process should only take about 30 seconds.

I left it in the fridge overnight and the flavors only got better!
Enjoy!!


Fennel Slaw and Melon Balls

Ingredients
  • 1/2 small honeydew melon, seeded
  • 3 tablespoons vegetable oil
  • 3 tablespoons red wine vinegar
  • 1 teaspoon Dijon mustard
  • 1 teaspoon honey
  • 1 teaspoon lightly roasted cumin seeds, ground
  • salt to taste
  • fresh ground black pepper to taste
  • 1 medium fennel bulb, thinly sliced
  • 2 tablespoons fresh dill leaves
Cooking Directions
  1. Scoop out the honeydew with a melon baller, set aside.
  2. Whisk together oil, vinegar, mustard, honey, cumin, salt and pepper to make the dressing.
  3. Toss the fennel and honeydew in the dressing to coat.
  4. Garnish with dill.
  5. Serve chilled.

Indian Slaw (Bund Gobhi Nu Shaak)

Ingredients
  • 1 pound cabbage (half a small head) or 14 ounces (1 bag) coleslaw mix
  • 1-2 fresh green Serrano chiles, stems discarded
  • 1/4 cup dry-roasted peanuts
  • 1/4 cup dry, unsweetened, shredded coconut
  • 1/4 cup finely chopped cilantro leaves and tender stems
  • 1 1/2 teaspoons coarse kosher or sea salt
  • juice from 1 medium-sized lime
  • 2 tablespoons canola oil
  • 1 teaspoon black or yellow mustard seeds
  • 1/4 teaspoon ground turmeric
Cooking Directions
  1. Remove the core from cabbage and shred very thin (or open coleslaw mix). Place in large bowl.
  2. Slice the chiles lengthwise and then cut them into thin slices, crosswise, ending up with half-moons of chiles that still have the rib and seeds within. Do not discard the seeds. Add this to the cabbage.
  3. Chop peanuts in a spice grinder, food processor or mini chopper to a consistency of coarse bread crumbs. Letting the machine run continuously may yield peanut butter.
  4. Add peanuts, coconut, cilantro, salt, and lime juice to bowl cabbage.
  5. Heat oil in small skillet over medium-high heat. Once the oil shimmers, add mustard seeds, cover the pan, and cook until the seeds have stopped popping, about 30 seconds. Remove the pan from the heat and sprinkle in the turmeric.
  6. Pour over cabbage. Wipe skillet clean with some cabbage shreds.
  7. Thoroughly mix the contents of the large bowl to ensure every shred is evenly coated.
  8. Serve either at room temperature or chilled.

 Print Friendly and PDF

Wednesday, April 27, 2016

Spicy Rice Pilaf (Pilau Masala) & Carrot Rice (Carrot Sadam)

America's Test Chicken consists of two separate chickens, each with her own take on this cooking thing. Check out Chicken One's related blog, A Travel for Taste where she shares travel stories and recipes collected whenever she ventures abroad. And give Chicken Two's new, also-related blog, Poop from the Coop a read. There you can find stories about her personal adventure re-experiencing the kitchen after many years away. Please join our Facebook group to share your own recipes, kitchen practices and know-how. We are also on Pinterest and Instagram.
The complete recipes appear at the end of this post.


From Chicken One:  
Spicy Rice Pilaf (Pilau Masala)

If you've been following this blog, you know that America's Test Chicken is all about trying things in the kitchen that intimidate us. At the beginning of this year we delved into Indian cuisine, covering everything from vindaloo to tandoori.

This time each Chicken chose a rice dish from India. You might know them as pilaf, which is variously spelled pilau or pulao in India.

Pilaf/pilau is defined by perfuming some oil with spices before sauteeing rice in the oil. After that, the rice is cooked in a standard way.

My pilau is from northern India and is referred to as Pilau Masala, which really just means spicy rice.

My recipe comes from Indian Harvest by Vikas Khanna, although it does appear in Indian Cooking Unfolded by Raghavan Iyer with slight variation - plus hundreds more recipes online. This rice is a wonderful side dish to curry or alone as a main dish.

The ingredients are simple and beautiful:
Cloves, cardamom and bay leaf perfume the oil, then onions are added:
And finally the rice. After the rice sautes, you can either cook uncovered until the rice is tender, or you can cover it and steam it til done. I cooked this batch uncovered per the recipe, but I think next time I'll steam it. I know the method better, and I won't have to keep adding liquid and tending it so closely.
The word 'perfume' truly is the description for this! The flavor is very light and subtle, and the scent is sweet. It reminds me of the cinnamon rice-and-raisins I had as a child. This pilau, however, is not sweet at all, just lusciously savory.

It's easily converted to vegetarian by using vegetable stock or plain water, though I used chicken stock (of course!).

I added the split chickpeas per the recipe, and they provide lots of protein for vegetarian types. Besides, I had some left over from the puran poli recipe. However, you can leave those out, too, if you like. I think lentils would work just as well.

Oh, man, now I'm hungry!
From Chicken Two:
Carrot Rice (Carrot Sadam)
There seem to be many versions of this tasty dish so I picked the simpler version that can be made quickly as a side or even a main dish. It originates from southern India and is often used as a lunch to pack in the kids' lunch box.  I take that to mean it can be served hot or cold.
Just a few ingredients that include peanuts, onion, ginger and carrots.  You'll find the recipe below.

I just want to point out that the jar of basmati rice (above) used to be full! We've been cooking (and eating) a lot of Indian dishes lately and that usually calls for rice!!
The recipe says grate the carrots, but I only had small ones in the fridge so I ground them instead. Improvise, I say!
This version calls for margarine to sauté the vegetables and spices, but I used ghee. You can also use a healthy oil as a substitute.
This is a very tasty dish, somewhat nutty and I will definitely cook it again, possibly as the main course with a salad or green veggie. I have some left over, so I'm going to try it cold too....I figure the kids must like it if it's so common!

Give it a try! Enjoy! 

Pilau Masala (Spicy Rice Pilaf)

Ingredients
  • 2 tablespoons vegetable oil
  • 1 large bay leaf
  • 3 cloves
  • 3 whole pods cardamom
  • 1 cinnamon stick, 3 inches
  • 1 medium onion, thinly sliced
  • 1/3 cup split chickpeas (chana dal), rinsed and drained
  • 1 cup basmati rice, rinsed and drained
  • 2 1/2 cups chicken or vegetable stock or water
  • salt to taste
  • fresh ground pepper to taste
  • 1/3 cup frozen peas, thawed
Cooking Directions
  1. Heat oil in large saucepan over medium heat. Saute bay leaf, cloves, cardamom and cinnamon for 1 minute. Add onion and saute another 2 to 3 minutes til soft.
  2. Add chickpeas and cook 2 minutes, stirring.
  3. Add in rice and saute another 2 minutes.
  4. Add stock, salt and pepper. Cook, stirring often, until moisture is absorbed and rice and chickpeas are just tender.
  5. Serve hot. 


Carrot Rice (Carrot Sadam)

Ingredients
  • 1 cup basmati rice
  • 2 cups water
  • 1/4 cup roasted peanuts
  • 1 tablespoon margarin
  • 1 onion, sliced
  • 1 teaspoon minced fresh ginger
  • 3/4 cup grated carrots
  • salt to taste
  • cayenne pepper to taste
  • chopped fresh cilantro
Cooking Directions
  1. Combine rice and water in a medium saucepan. Bring to a boil over high heat. Reduce heat to low, cover with lid, and allow to steam until tender, about 20 minutes.
  2. While rice is cooking, grind peanuts in a blender and set aside. Heat the margarine in a skillet over medium heat. Stir in the onion; cook and stir until the onion has softened and turned golden brown about 10 minutes. Stir in ginger, carrots, and salt to taste. Reduce heat to low and cover to steam 5 minutes. Stir in cayenne pepper and peanuts. When rice is done, add it to skillet and stir gently to combine with other ingredients. Garnish with chopped cilantro.


 Print Friendly and PDF
