Saturday, October 10, 2015

Hard Whiskey Sauce & Caramel Sauce for Bread Pudding

America's Test Chicken consists of two separate chickens, each with her own take on this cooking thing. Check out Chicken One's related blog, A Travel for Taste where she shares travel stories and recipes collected whenever she ventures abroad. And give Chicken Two's new, also-related blog, Poop from the Coop a read. There you can find stories about her personal adventure re-experiencing the kitchen after many years away. Please join our Facebook group to share your own recipes, kitchen practices and know-how. We are also on Pinterest and Instagram.

This time: two luscious sauces for last month's bread pudding!
The complete recipes appear at the end of this post. 

From Chicken One:
I, of course, opted for the sauce with the liquor in it.
Both these sauces are super easy, but I think the hard sauce is even easier than Chicken Two's caramel sauce over there. The whole thing takes about 5 minutes after you've gathered the ingredients.

Just melt some butter and stir in some sugar, an egg yolk and some water. Once it boils, remove from heat and stir in the hard stuff.
It's best warm spooned over bread pudding.
No major SCAFU's to report this time, thank the Great Hen and dessert gods!


From Chicken Two:
    I think this version - the Caramel Sauce - is super
    easy too! The trick is NOT overcooking! Burned
    caramel sauce ain't tasty!

Just combine the ingredients and cook until bubbly.
Be sure to stir constantly and, when the sauce looks
slightly curdly, cook and stir for another 2 minutes.
You'll add the vanilla after you take the pot off the heat.
If you've never had warm bread pudding (yes, you can serve it over cooled pudding), you're missing a real treat!

There are a couple of other sauces you can use as well such as Vanilla or Bourbon Sauce, but I invite you to use your imagination and create your own using your favorite flavors. Let us know how it turns out!

Caramel Sauce for Bread Pudding
Ingredients
  • 1/2 cup brown sugar, packed
  • 1 tablespoon cornstarch
  • 1/4 cup water
  • 1/3 cup half-and-half or light cream
  • 2 tablespoons light corn syrup
  • 1 tablespoon butter
  • 1/2 teaspoon vanilla extract
Cooking Directions
  1. In a small, heavy saucepan, combine brown sugar and cornstarch. Stir in water. Stir in half-and-half, corn syrup, and butter. Stir over medium heat until bubbly (mixture may appear curdled). Stir 2 minutes more. Remove from heat; stir in vanilla. Serve warm or cool over bread pudding. Also great for ice cream, baked fruits or cake. Cover and chill any leftovers for up to 3 days.

-----------------

Bourbon Sauce for Bread Pudding

Ingredients
  • 1/4 cup butter
  • 1/2 cup sugar
  • 1 egg yolk, beaten
  • 2 tablespoons water
  • 1 - 2 tablespoons bourbon
Cooking Directions
  1. In a small saucepan melt the butter. Stir in the sugar, egg yolk and water. Stir over medium-low heat 5 to 6 minutes or until sugar dissolves and mixture boils. Remove from heat, stir in bourbon. Serve warm over bread pudding.
Print Friendly and PDF

Wednesday, September 16, 2015

Bread Pudding Recipe and Tutorial

America's Test Chicken is proud to announce the launch of Chicken Two's new blog, Poop from the Coop! Check with her often for stories about her personal adventure re-experiencing the kitchen after many years away. Of course, Chicken One has her longstanding A Travel for Taste blog where you can share her travel and food stories and recipes she collects whenever she ventures abroad. Please also join our Facebook group to share your own recipes, kitchen practices and know-how. We are also on Pinterest and Instagram.

The complete bread pudding recipe appears at the end of this post.
Next month: two amazing sauces to smother over this month's delightful bread pudding recipe


From Chicken One:


While Chicken Two (author of the new Poop from the Coop blog) gives you the down-low on how to turn out a great dish of this month's specialty, I'll fill you in on some history, etymology and personal ramblings.

Bread pudding is, according to The New Food Lover's Companion,
A simple baked dessert made with cubes or slices of bread saturated with a mixture of milk, eggs, sugar, vanilla and spices. Chopped fruit or nuts also can be added. Bread and butter pudding is typically made by buttering the bread slices before adding the liquid mixture. Both may be served hot or cold with
cream or a dessert sauce.

Bread pudding is appealing; there’s no doubt about it. Part of the appeal for me is the fact bread pudding makes use of stale, day-old bread. Food historians generally agree that bread pudding evolved from frugality. That is, cooks, probably poor ones, found a way to turn old bread into a viable dish.

So I don’t have to throw old bread away! I hate throwing food away so bread pudding satisfies me on an emotional level while I’m making it. Eating it satisfies in a different emotional way, but that requires a completely different support group.

Pudding has an ancient, checkered past. It has a checkered present, for that matter. Americans think of pudding as that custard-like comfort dessert from childhood, despite Bill Cosby’s current troubles. However, in Britain, pudding can be anything from a chocolate mousse to Yorkshire pudding, which is close to an American popover. Apparently, too, bread pudding in Britain is known as “Wet Nelly”. I would love to hear from readers who have first-hand experience with this dish in Britain.

If you want to be grossed out, check into the evolution of puddings through history. What started out as sausages (meat encased in intestines and cooked) eventually evolved into cereals and meal steamed in pudding cloths instead of intestines, which then morphed into the puddings of today. Oh, there have been, and still are, so many variations of pudding all over the world that I got dizzy and had to stop researching. If you are interested, leave me a comment and I’ll send you my sources.

The word “pudding” itself also has an interesting story. It started out in Latin as botellus, which means “sausage”, which found its way into French as boudin, which also means “sausage”. If you know how to pronounce that French word, you can easily see how it might have become “pudding” in English.

Speaking of boudin, my only experience with this sausage is via Cajun cuisine. Turns out bread pudding is a specialty of New Orleans, just like boudin. In fact, Chicken Two has a New Orleans cookbook she got on a recent trip there with a wonderful bread pudding recipe, including hard (whiskey) sauce.

Speaking of sauce, bread pudding depends on a sauce spooned over it before serving. The Chickens experimented with an aforementioned hard sauce and a caramel sauce as well. You can find our sauce recipes and results in next month’s post. So subscribe to this blog to keep abreast of all our kitchen shenanigans.


Just for you:
Here is a picture of chickens eating bread pudding. (Don't worry, it's actually a recipe made for chickens so they don't get sick from eating people food.)


From Chicken Two:

When we decided to try bread pudding with our leftover bread, I don't think either of us realized the variations available. Just try Googling "bread pudding recipe" and see what happens. Who knew??

So this first attempt was to get back to the original recipe that reminded us of Grandma's great pudding.
No fancy inclusions, just plain old bread and stuff.

You can use any leftover stale bread - French bread works best, but if you don't have that, you can toast up regular bread if it's not real stale. Just make sure the bread is dry and hard.

In a large bowl beat together eggs, milk, sugar, vanilla, orange peel (if desired) and cinnamon.
It was a great opportunity to use my Cuisinart processor!
 
In an ungreased 2-quart square baking dish (ok, mine wasn't exactly square) toss together bread and dried fruit: 
Pour egg mixture evenly over the bread mixture and press lightly with the back of a large spoon.
Bake, uncovered in a 350 degree oven for 40 to 45 minutes or until puffed and a knife inserted near the center comes out clean. 
Serve warm with a sauce of your choice. Our favorites are  Caramel Sauce and Bourbon Sauce. Both will be discussed in the next installment.

A couple of tips:
Don't try to shorten the time. The first time I did it, I was tired and in a hurry. Tasted good but didn't have much texture and was kinda runny.


Bread pudding must use dried bread because it must absorb the custard mixture you pour over it before baking.

The more liquid you pour over the bread, the denser the baked result. Therefore, you have a lot of control over the texture of the finished product.

Let us know how yours turned out!


Bread Pudding

Recipe by America's Test Chicken
Traditional bread pudding recipe
Ingredients
  • 4 eggs, beaten
  • 2 1/4 cups milk
  • 1/2 cup sugar
  • 1 tablespoon vanilla
  • 1/2 teaspoon ground cinnamon
  • 4 cups cubed French bread, day-old/stale/dried
  • 1/3 cup dried cherries or raisins
Cooking Directions
  1. To dry bread cubes, place them in single layer on a large, shallow baking pan. Bake at 350-degree F about 10 minutes, stirring twice. Let cool.
  2. In a large bowl beat together eggs, milk, sugar, vanilla, and cinnamon. In an ungreased, 2-quart square baking dish, toss together bread cubes and dried cherries. Pour egg mixture evenly over bread mixture. Press mixture lightly into pan with back of a large spoon.
  3. Bake, uncovered, in a 350-degree F oven for 40 to 45 minutes or until puffed and a knife inserted near the center comes out clean. Cool slightly. Serve warm with caramel or bourbon sauce.
  4. Keeps well in a sealed container in the refrigerator overnight. Reheat to serve leftovers.
Print Friendly and PDF

Tuesday, August 4, 2015

Mayonnaise


By Chicken One -
I LOVE making homemade mayonnaise! The first time was a few years ago using my food processor and it went perfectly.

But, as with most things that go wonderfully the first time around, we keep chasing that first, perfect result every time thereafter. And with mayo, it's a real roll of the dice.

I thought it was me; about a third of my attempts end in a mayo disaster. Runny, separated goop instead of a creamy emulsion. But turns out that's completely normal.

Fortunately, when I was showing Chicken Two how to make it (with no guarantees understood), I'm happy to say it turned out beautifully.


Making mayo in your kitchen is actually very easy. Break a few eggs and separate the yolks from the whites.

Put the yolks in a food processor with a little mustard, some vinegar or lemon juice and any herbs you want (or garlic) and pulse til smooth.

With the processor on low, drizzle in a VERY THIN stream of extra light olive or vegetable oil.
In a few minutes, ideally just as you finish drizzling the oil, the mixture suddenly emulsifies and you have beautiful, homemade mayo!
Now, about those disasters. If it fails, it fails. But it's still edible and you can make salad dressings out of it by adding herbs, spices and other goodies. But it's damn hard to rescue a broken mayonnaise.

Some websites recommend making a second recipe and, instead of more oil, drizzle in the broken mayo. I've tried this and other methods to the point of tearing out my hair and running screaming into traffic, all to no avail. I've never gotten it to work.

I WILL say that Chicken Two has a more reliable method over there on the right. It's worked for me more consistently than the food processor method.

Leave us a comment and tell us what YOUR results are!

By Chicken Two - 
I'm always looking for an easier way to do things and to shorten my time so I love this method!

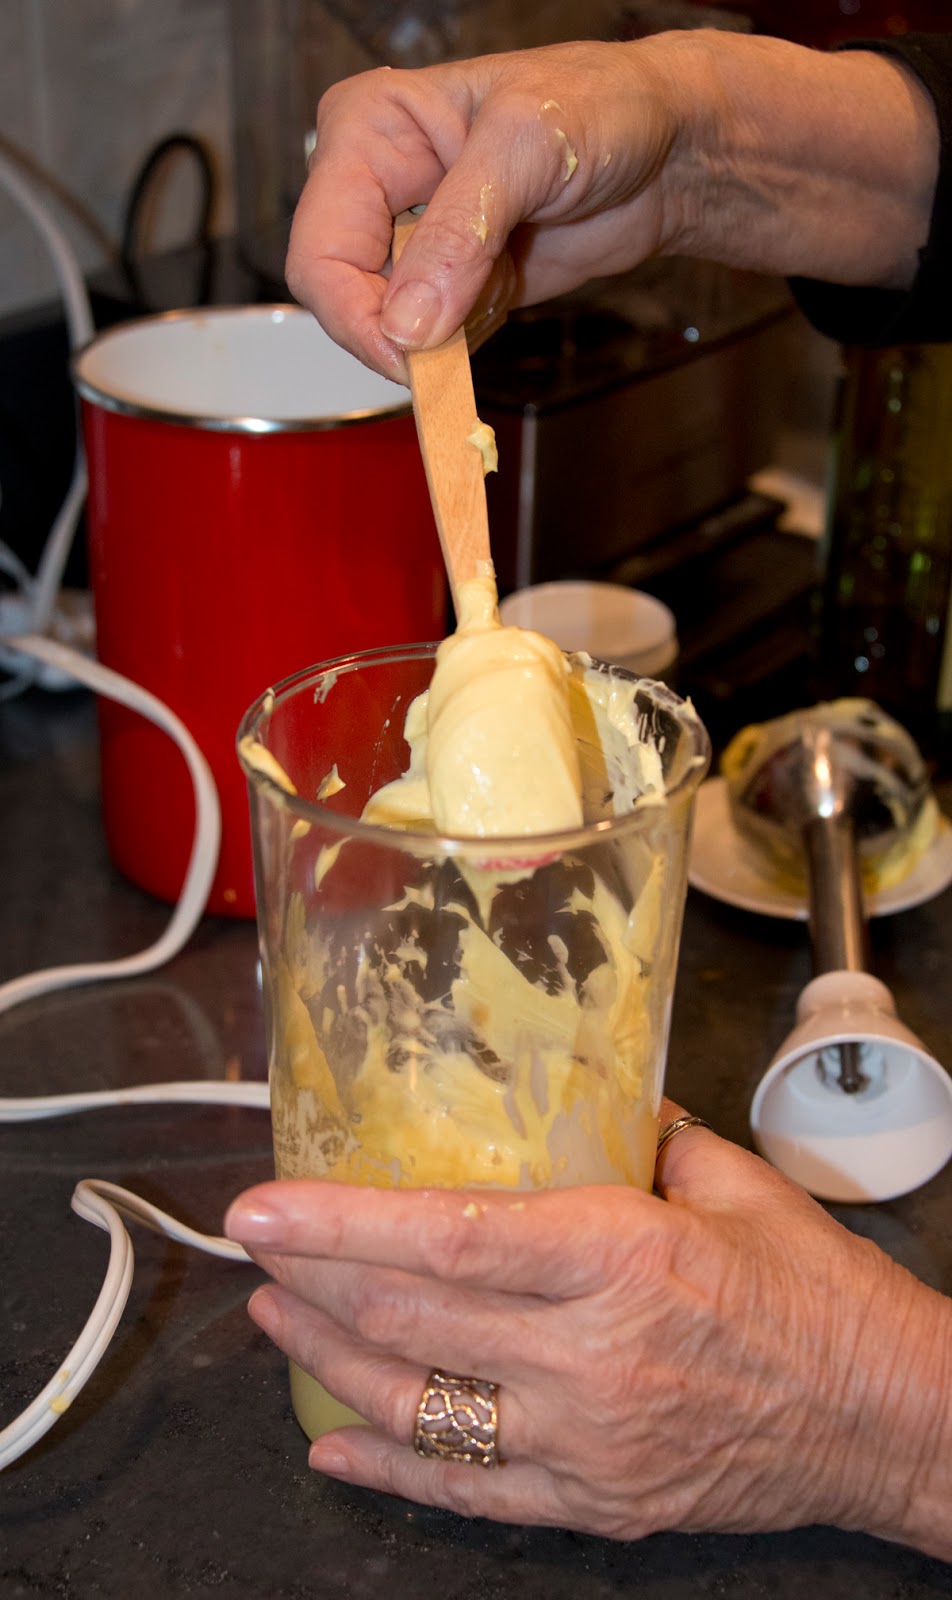
This variation uses a stick blender and its container or a jar just wide enough for the stick blender to fit. A too-wide jar sets you up for failure. You can use a whisk instead, (like Julia!) but we haven't tried it…..yet.

So…are you ready? Just put everything in the container at once…you don't have to drizzle anything, just throw it all in and whip!


Now wasn't that easy????

The result is fresh, tasty mayo! You MUST refrigerate it and because it doesn't have any preservatives, it will only last 3 - 5 days. 

And because I know you're going to ask - yes, you can use any light oil or even a combo of oils. You can also use extra virgin olive oil, but your mayo will taste strongly of olive oil. We think lighter oils are better, especially with added herbs like rosemary, basil, garlic, fresh ground black pepper, etc. Try it your way and let us know how you like it!


Mayonnaise Recipe
Yield: 1 1/2 cups

Ingredients:
1 large egg  (or 2 for much thicker mayo)
1 tablespoon freshly squeezed lemon juice (white wine vinegar can be substituted, if necessary)
1 tablespoon Dijon mustard
1 1⁄4 cups canola oil


Use fresh, cold eggs for the best result.


Saturday, July 4, 2015

Flan, or Crème Caramel


By Chicken One - 
Flan Recipe

Or crème caramel …… I've always been confused so we looked it up: "This custard dessert is  known as flan in Spain, in Italy as crema caramella and in France as crème renversée. It is a custard that has been baked in a caramel-coated mold. When the chilled custard is turned out onto a serving plate it is automatically glazed and sauced with the caramel in the mold." Thank you Dr. Google!

So we set out to prove we could make it, no matter what we called it!

Caramel:

1 cup (7 ounces) sugar
1/2 cup water
2 tablespoons of light corn syrup
1/4 teaspoon of juice from a lemon


Custard:

1 1/2 cups whole milk
1 1/2 cups of light cream
3 large eggs, plus 2 large egg yolks
2/3 cup (4 1/2 ounces) sugar
1 1/2 teaspoons vanilla extract
pinch of salt

For the caramel:
In a medium pan, bring sugar, water, corn syrup and lemon juice to a simmer, without stirring, over medium-high heat. (see SCAFU at right) Wipe any sugar crystals off the sides of the pan with a wet pastry brush because they can cause the syrup to be grainy. Continue to cook until the syrup turns from clear to golden, swirling the pan continuously for even browning until large, slow bubbles on the surface turn honey-caramel in color.


Remove the pan immediately from the heat, and working quickly (and carefully - it's very hot!), pour a portion of the caramel into each of 8 ungreased 6-ounce ramekins. Our ramekins were larger (hey, use what you have on hand!) so we only used 6. Allow the caramel to cool and harden, about 15 minutes.
For the custard:
Preheat oven to 350 degrees (make sure rack is in the middle).

Heat milk and cream in a medium saucepan over medium heat, stirring occasionally, until steam appears - usually 6-8 minutes- remove from heat.

Meanwhile, gently whisk the eggs, yolks, and sugar in a large bowl until just combined. 


Off the heat, gently whisk the warm milk mixture into the egg mixture, adding vanilla and salt. Strain the mixture  through a fine mesh cloth into a large measuring cup or a bowl with a pouring spout. Set aside.
Place the ramekins in a large baking dish or roasting pan and divide and pour the custard mixture evenly into them.
Fill the pan with about two cups of boiling water so that it reaches about half way up the sides of the ramekins. At this point you can cover the pans loosely with aluminum foil, allowing the steam to escape.
Bake until a paring knife inserted halfway between the center and edge of the custards comes out clean, about 35 to 40 minutes.  Transfer to a wire rack and allow to cool to room temperature. They can then be chilled in the fridge (loosely covered with plastic wrap) for up to 2 days.
To unmold, slide a paring knife around the perimeter of each ramekin. Holding a serving plate over the top of the ramekin, invert and set on the work surface. Gently shake the ramekin to release the custard.
Voila!

By Chicken Two -
It should be noted that us two Chickens trade columns with no rhyme or reason. That is, Chicken One (Column 1) may be Chicken Two the next week. In this case we were both essentially Chicken One because we didn't do two variations of this recipe.

But we did have a SCAFU:
If you have been cooking for hours and hours in a hot kitchen with another Chicken and you have not properly concentrated on the recipe at hand (or in this case recipes), this is what will happen if you inadvertently tell the other chicken to add much less water than the recipe calls for:
Sandy, dry sugar that only bubbled and looked like the salt flats. Mea culpa. 

The solution: Dump it out and start over. We did.

Here is what it SHOULD (and eventually did) look like:
Potential SCAFU for You:
Watch the sugar mixture CLOSELY and be prepared to remove it from the heat at a moment's notice. It takes a little practice to recognize when the sugar reaches the appropriate color, and you have to react immediately when it does. Use our picture here as a guide. Don't be afraid to waste several batches of sugar water to practice. Sugar and water are cheap.

NEVER think you can get away with "just a little scorching". It will ruin the flavor of the whole dish. The solution: Dump it out and start over. Worth it.

Another potential SCAFU for You:
Flan can become weepy after it's unmolded. That is, sometimes it can seem to secrete water after you put it on a plate and you end up with the custard standing in watery caramel sauce. To avoid this, make sure you strain the egg mixture through cheesecloth before pouring them into ramekins. If you don't strain it, you might serve a swampy dessert.


For a different variation of flan that includes cream cheese, check out my travel and food blog, A Travel for Taste, wherein a Mexican friend and I attempted her mother's flan recipe. I personally witnessed my friend speaking to her mother in Mexico online, so I'm sure the recipe came straight from her. The Mexican version I tried is not the same as the flan presented here at all, but it's addictively delicious nonetheless!

While Chicken One was writing up the recipe at the left, I was left to my own devices. As often happens with me, I started thinking about words. This time it was the word ramekin. It is a word that's come relatively recently to my vocabulary, just since I started really concentrating on learning recipes like this. There were certainly no ramekins in my house growing up; meat and potatoes don't require anything so elite! Therefore, I did a little research on the word and came up with the following info I thought I'd share with you:

Ramekin comes from the French word ramequin. The first mention of that word is found in text from 1706. Linguists theorize the French word comes from a Flemish word rameken or a Middle Dutch word ramken, both diminutives of "cream". This makes sense to me because in German, "cream" is rahm and diminutives are formed by adding -kin. Oh, and one source (it rhymes with Schmikipedia) had it ALL wrong, saying the Flemish word came from a word that meant "battering ram". Right.

One more note: As opposed to flan, crème brûlée is a custard with a hard caramel on top instead of the liquidy version. We will get to crème brûlée presently as chickens. Be patient.


Thursday, June 18, 2015

Poached Eggs, Two Ways


By Chicken One -
In a pan on the stove (as Nature intended):

Right from the beginning of this chicken project the idea has been to try new things. And at least two ways. Therefore, I was very excited to try poaching an egg for the first time.

I don't really care for eggs, but I felt poaching some of them would be a real challenge. Of course I'd seen Julia do it a number of times on video, so it gave me a basis of what to expect.

The other Chicken and I stocked up on a couple of dozen and printed out some wonderfully detailed directions from one of my idols, Alton Brown.

I first brought one inch of water, a pinch of salt and two teaspoons white vinegar to a simmer over medium heat. It's important to not boil the water, by the way.

Then I cracked one really cold egg into a nifty little bowl (Chicken Two - the younger, prettier one - has a huge inventory of every ceramic shape imaginable) with a pour spout.

I gently stirred the simmering water with the handle of a wooden spoon to create a gentle whirlpool. Then I gently poured the egg into the middle of the pan. Did I mention that all this should be done gently?
The whirlpool action keeps the egg more or less centrally located in the pan and discourages the whites from streaming all over the pan.

Next I turned off the heat and covered the pan for five minutes. It's important not to lift the lid or disturb the egg in any way until   the five minutes are up. Fortunately Chicken Two has glass lids and we didn't have to wonder what was going on in there.


 After the timer startled us out of staring at the egg, I removed the lid.
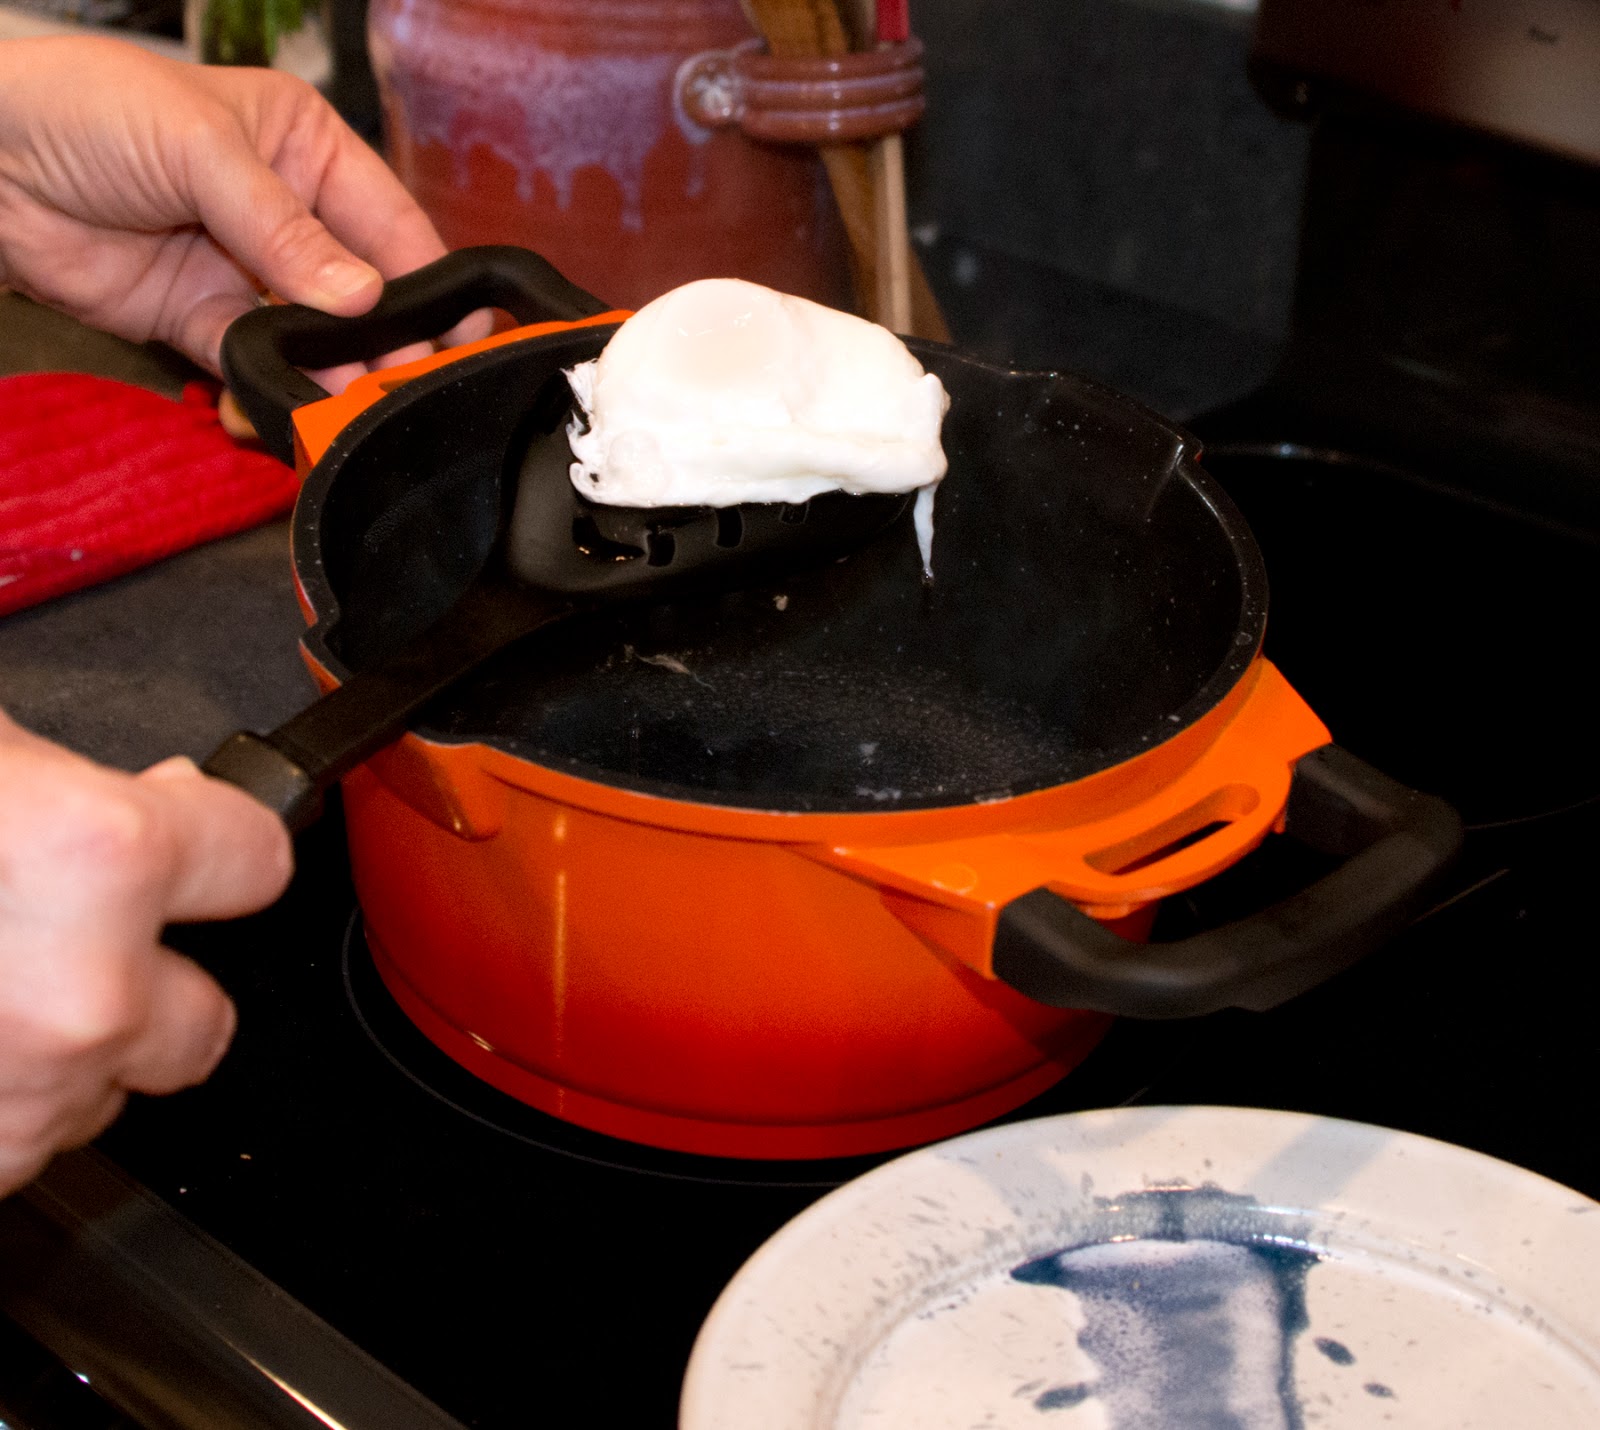
I carefully, one might say gently, lifted the egg out of the water with a slotted spoon.
Perfectly poached eggs should have thoroughly cooked whites and a runny yolk. I held my breath and the camera as Chicken Two sliced my first poached egg in half. The moment of truth:
Success! It was perfect!
I'm so proud of it I'll post two pictures!
Not bad for a first time, am I right? Now where's that English muffin, Canadian bacon and Hollandaise....?


By Chicken Two -
In the microwave:

Like Chicken One, I was also intimidated by the very idea of poaching an egg. Kinda silly for two people who can turn out a delicious leg of lamb, make their own pasta and concoct all sorts of wonderful variations of pizza!

I watched with great anticipation (and patience) while she carefully maneuvered that egg around and, granted, it was sheer perfection. But it took way too long for me! I don't know about you, but when I want breakfast, I'm usually in a hurry so I needed to find a faster way. Enter a rather inexpensive tool called the Microwave Egg Poacher! It's microwave, right? It should be faster, right? Hmmm….

First, read the directions!

Then break the egg and gently empty the shell into the holder.

It holds two eggs, so you can make one for your honey too!

Then carefully puncture the yolk. If you don't do that, the yolk will explode - trust me - I know!

Cover with the provided lid and insert into the microwave oven, and set at 1 minute.


The resulting egg looked beautiful. Well formed, thoroughly cooked and soft on the outside.  However, the inside, though soft, was not runny. Foiled!

Here's how it looked when cut open. Some folks actually prefer a less runny egg, so this 1 minute setting will work for them. However, Chicken #1 challenged me - yeah, we get a little competitive - to make the perfect egg so I kept playing with the microwave settings. 45 seconds, 40 seconds, 35, 30 - you get the idea! A dozen eggs later, except for the nearly raw one, the inside continued to be less soft than the "perfect" poached egg.

I guess the moral of this story is, you sacrifice perfection for speed. It WAS faster (unless you count the times I repeated the process), but nothing beats slow, steady, old fashioned cooking!